
Deploy your app on AWS S3
Apr 10, 2022
Stormkit users can now deploy their static applications directly to their AWS account.
Create AWS credentials
To deploy your application on AWS S3, you will have to have a user with programmatic access and grant necessary permissions to upload files on the bucket. To do so, visit the IAM Service and create a new user with programmatic access, with the following policy attached:
{
  "Version": "2012-10-17",
  "Statement": [
    {
      "Effect": "Allow",
      "Action": ["s3:ListBucket"],
      "Resource": "arn:aws:s3:::<bucket-name>"
    },
    {
      "Effect": "Allow",
      "Action": ["s3:*"],
      "Resource": "arn:aws:s3:::<bucket-name>/*"
    }
  ]
}
Make sure to replace <bucket-name> with your actual bucket name.
S3 bucket permissions
Go to your S3 Bucket and click on Permissions. Make sure to have:
- Block all public access turned on and
- Object Ownership to be Bucket owner enforced
This will increase the security of your S3 bucket and will block public access.
Grant CloudFront access to S3 bucket
Now that we have blocked public access, we'll need to grant CloudFront access to S3. The official documentation contains all the steps required, but essentially
you'll need to create an OAI so that CloudFront can access your S3 bucket and serve the files.
To do so:
- Go to your CloudFront distribution
- Click on Origins tab
- Select your origin
- Click on Edit
- Make sure Yes use OAI (bucket can restrict access to only CloudFront) is checked
- Optionally you can select Yes, update the bucket policy to update the bucket policy automatically
Configuring Stormkit
Now that your AWS account is ready, go to Stormkit and find the Environment that you'd like to connect to your S3 Bucket. Click on the three dots menu next to the environment name and choose Custom Storage.
Use the Access Key ID and Secret Access Key obtained from the IAM user and provide the bucket name created above. Make sure to have the region configured correctly. Here's an example:
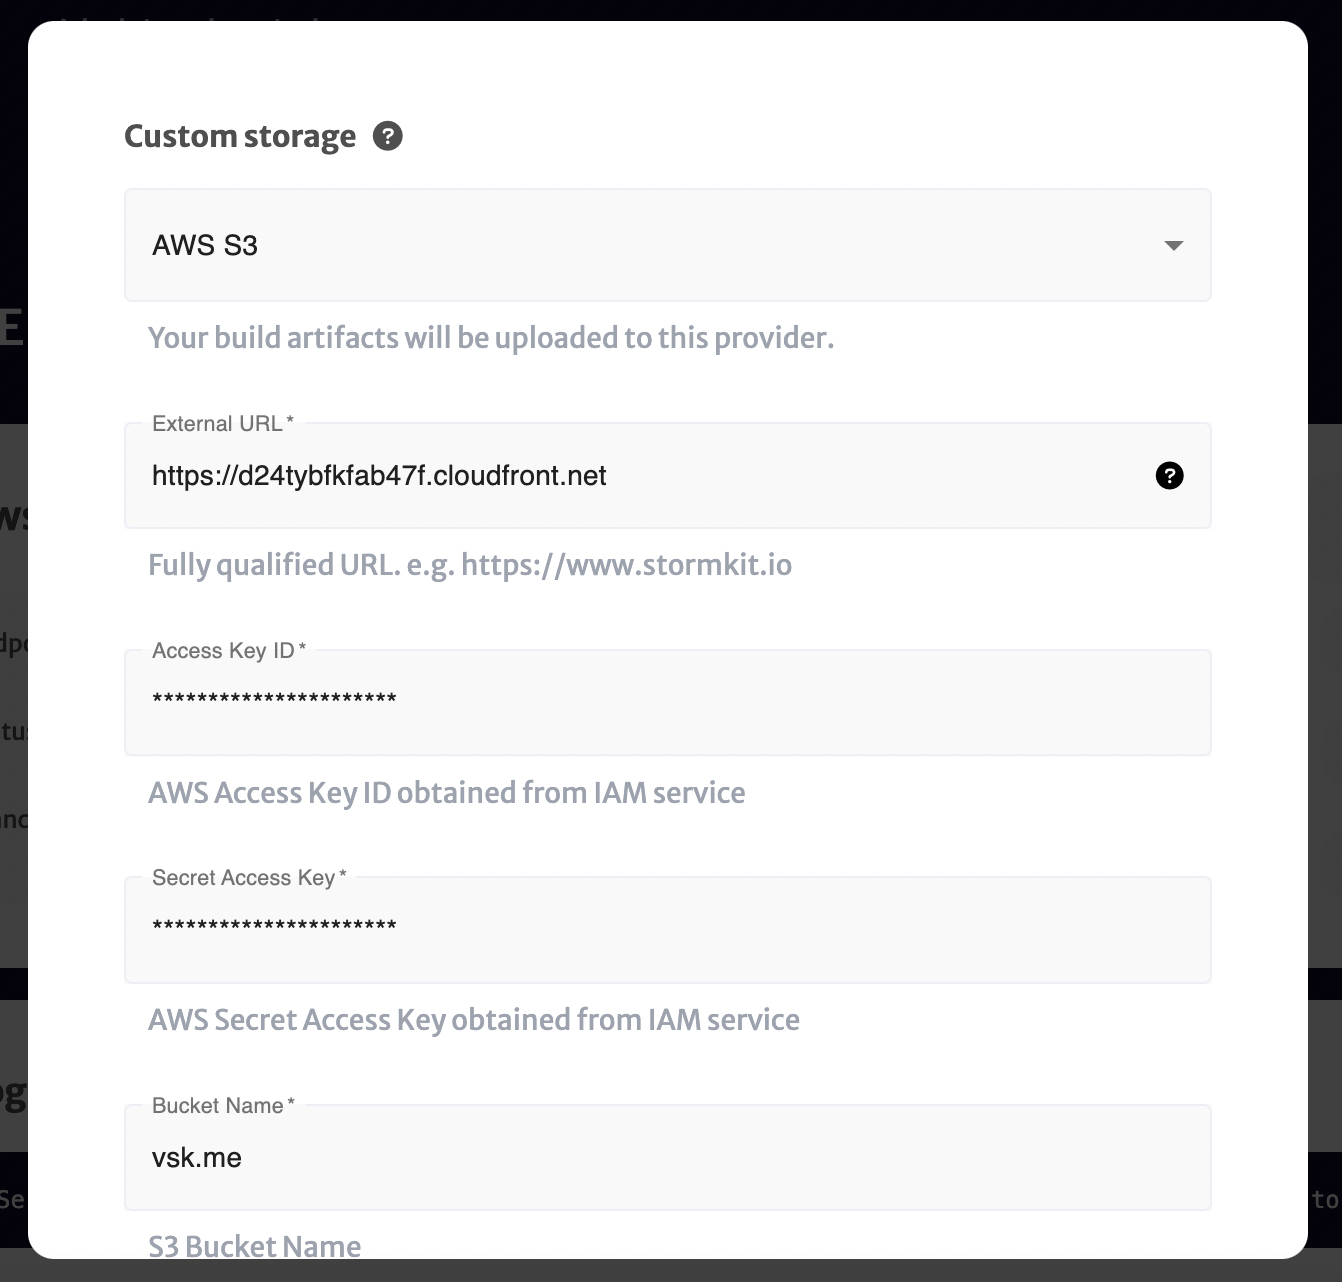
Click submit.
Time to deploy
Now your integration is ready. Anytime you deploy with the Publish toggle turned on, Stormkit will deploy your branch directly to your AWS account and will overwrite existing files. From git push right into your
S3 bucket.
Previewing your application
You can create multiple environments and connect them to different buckets. For instance, you could have a staging environment to preview your application before releasing it to production.
© 2024 Stormkit, Inc.